Here's my new best friends, an electrician and a builder, arriving today. Young people with good backs who can wrestle those floor joists into place that I was preparing 2 and 3 posts back.
Here's Misty organising some pot lights upstairs. Electricity and all its hidden wires is a complete mystery to me. When Ben gets the new ceiling in over the kitchen, she will install a couple of track lights down there.
Most of the joists are up, tomorrow I'll be excited to see the T&G floor/ceiling go on and the railing come out.
It's been hard to get any pictures painted with all this other stuff going on. Here is an old photo I thought I'd use as a reference for a watercolor.
1958, Canning , Nova Scotia, what a wonderful carefree time to have a childhood...nowadays those kids would have hemets on and safety harnesses... or more likely be on the couch in front of a screen. The 4th kid from the left is me at age 8. At another farm closer to home, I was usually the only kid around at haying time and I got to drive the tractor as the men forked up the hay and built the load.
I stretched a piece of watercolor paper, did my pencil drawing and washed in some sky, blotting out clouds with a tissue. I dabbed on bits of masking fluid here and there to protect areas I wanted to keep white as sun highlights, and most of the rest got a warm yellow ochre wash.
Next I made up some background, painting each section more bluish towards the horizon to make the landscape recede. The tractor is going to be gray so I wet the area plus anything else that will be dark with plain water, and then dab in watery colors that will blend on their own to make a neutral gray, cobalt blue, aureolin, and rose madder. I left this alone knowing it would dry lighter .
With a damp brush I loosened the color in the spots where the sun would make a highlight and blotted off most of the color with a tissue. Then came some darks for the underneath layers of the hay. Now it's at the ugly stage where it's easy to get discouraged and go do something else. More progress in the next post.
Thursday, February 9, 2012
Monday, February 6, 2012
DIY - Easy garden seat/kneeler
Every year the Vesey's seed catalog has these dream items in their back pages, (as in "Look at that price! Dream on!")
And every year my knees and hips get a year creakier and this bench looks more and more appealing, especially the kneeling side with those 2 legs to use to push oneself back upright.
So with recycling close to my heart, I had an idea to make such a bench with that great $4.00 piece of 3/4" plywood I picked up at the Re-Store, just in case I might need it someday.
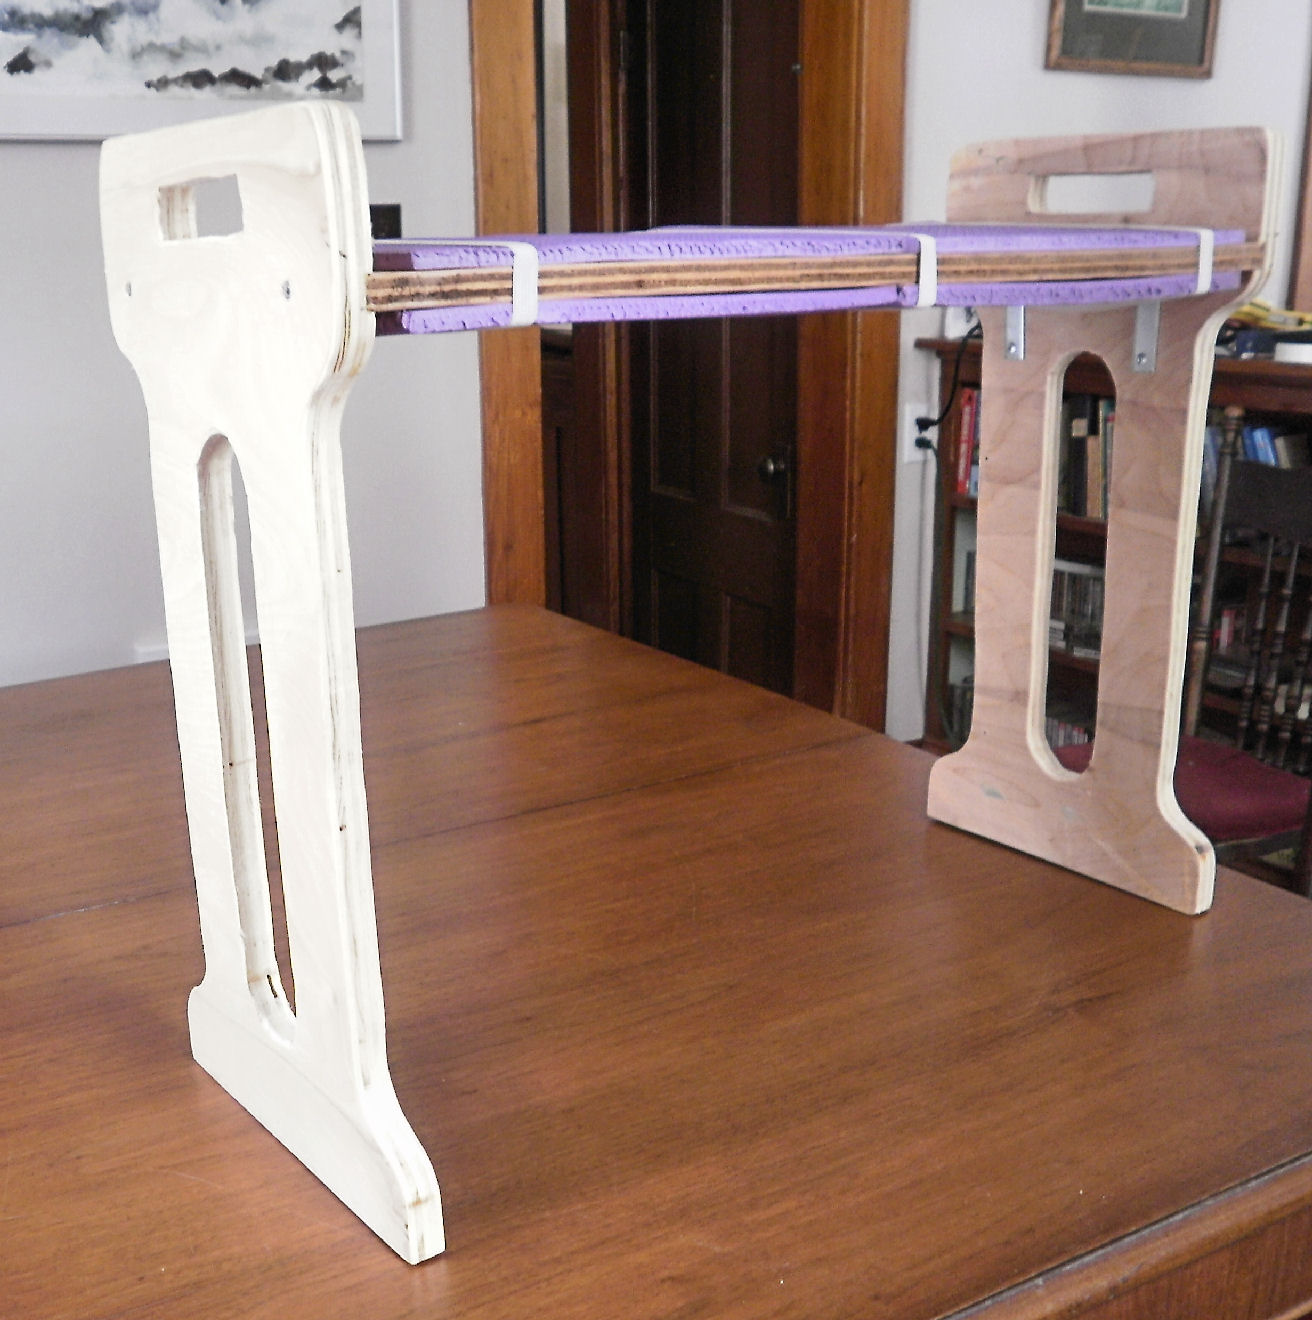
Here's my version , yet to be painted or stained. The dimensions are basically the same as the $55. model, but it weighs less, 6 3/4 lbs. I'm glad to say my behind is not 24" wide but I guess the seat has to be that wide so that when using the kneeling side, the uprights don't get in the way of working arms. The ends are 3/4 " plywood, the seat is a 5/8" plywood scrap rabbeted into the ends . The purple pads are those dollar store children's foam mats that fit together in squares. They are held on with elastic til I find some big rubber bands.
Underneath I used L brackets to stabilise and strengthen the glued joints. Next trip to the dollar store I think I'll add another layer of foam padding to the knee side of this creation.
A fun and satisfying day in out of the cold, tinkering in the workshop with a pot of tea on the woodstove. And one more thing crossed off the summer to-do list.
And every year my knees and hips get a year creakier and this bench looks more and more appealing, especially the kneeling side with those 2 legs to use to push oneself back upright.
So with recycling close to my heart, I had an idea to make such a bench with that great $4.00 piece of 3/4" plywood I picked up at the Re-Store, just in case I might need it someday.
Here's my version , yet to be painted or stained. The dimensions are basically the same as the $55. model, but it weighs less, 6 3/4 lbs. I'm glad to say my behind is not 24" wide but I guess the seat has to be that wide so that when using the kneeling side, the uprights don't get in the way of working arms. The ends are 3/4 " plywood, the seat is a 5/8" plywood scrap rabbeted into the ends . The purple pads are those dollar store children's foam mats that fit together in squares. They are held on with elastic til I find some big rubber bands.
Underneath I used L brackets to stabilise and strengthen the glued joints. Next trip to the dollar store I think I'll add another layer of foam padding to the knee side of this creation.
A fun and satisfying day in out of the cold, tinkering in the workshop with a pot of tea on the woodstove. And one more thing crossed off the summer to-do list.
Labels:
diy garden seat / kneeler
Saturday, January 28, 2012
Reno project chapter two..and other ramblings
After an awful LOT of tedious sanding, crack and knot filling, and then sanding again, now this floor space making project is getting to be more fun. Today I started the whitewashing of the underside of the 2x6 t&g that will be the kitchen ceiling. After a bit of trial and error I settled on a mix of 1 part water to 3 parts paint to make a wash that will reflect light but still show the pretty grain of the wood.
30 pieces of 12' t&g and 14 2x8 joists to paint, I might be finished by the end of the week...
You just slop on the paint and rub it into the wood with a rag.
Then follow with a dry cloth, wiping off any excess paint. This is just some ceiling paint I had leftover from a couple of years ago. Easier to do this now than up over my head once it's in place.
Spring has sprung for sure in the plant room upstairs. Delicious mesclun mix is ready for salads and sandwiches. I plant a few varieties of seeds every day. A great discovery this season was Gardens North in Annapolis Royal , NS. where I found seed for Trailing Arbutus, mayflower, my all time favorite flower fragrance. I have missed mayflowers in spring ever since I grew up and left Nova Scotia. As kids we would pick bunches and stand at the side of the road holding them out to passing cars. People would stop and buy a generous bunch for a nickel and a really big bunch for a dime. That was our Juicy Fruit Gum money.
Sure hope these tiny seeds will germinate...but I'll be keeping the flowers this time around.
30 pieces of 12' t&g and 14 2x8 joists to paint, I might be finished by the end of the week...
You just slop on the paint and rub it into the wood with a rag.
Then follow with a dry cloth, wiping off any excess paint. This is just some ceiling paint I had leftover from a couple of years ago. Easier to do this now than up over my head once it's in place.
Yesterdays storm has left us with a couple inches of icy snow. Here is a crowd of robins from 2 days ago. Poor things, I don't know how they're going to find anything to eat now. When I hear their calls it sounds like spring can't be far away.
Spring has sprung for sure in the plant room upstairs. Delicious mesclun mix is ready for salads and sandwiches. I plant a few varieties of seeds every day. A great discovery this season was Gardens North in Annapolis Royal , NS. where I found seed for Trailing Arbutus, mayflower, my all time favorite flower fragrance. I have missed mayflowers in spring ever since I grew up and left Nova Scotia. As kids we would pick bunches and stand at the side of the road holding them out to passing cars. People would stop and buy a generous bunch for a nickel and a really big bunch for a dime. That was our Juicy Fruit Gum money.
Sure hope these tiny seeds will germinate...but I'll be keeping the flowers this time around.
Labels:
Gardens North,
lettuce,
mayflowers,
whitewash
Wednesday, January 18, 2012
Climate change: It's awful but it's giving me guilty pleasure..
What's wrong with this picture? It's the freaking middle of january, it's Canada, and I'm working outdoors all day! A few years ago normal at this time of year would mean most of the four foot page wire fence disappeared under snow, and the neighborhood snowplow guys laughing on the way to the bank.
Here's our front yard today...
So there's another project on the go, involving lots of sanding outdoors, just waiting for a day like today.
Here is the view looking down on the kitchen from upstairs in our rental cottage. It's a cathedral type ceiling obviously. The plan is to create more space for the guests, especially a playspace for their kids, since up to 6 people in 24'x26' is kind of cramped. So the kitchen part will be floored over with 2x8 joists and 2 x6 t&g boards. (http://www.fundyfarmcottages.com/)
Here's our front yard today...
So there's another project on the go, involving lots of sanding outdoors, just waiting for a day like today.
Here is the view looking down on the kitchen from upstairs in our rental cottage. It's a cathedral type ceiling obviously. The plan is to create more space for the guests, especially a playspace for their kids, since up to 6 people in 24'x26' is kind of cramped. So the kitchen part will be floored over with 2x8 joists and 2 x6 t&g boards. (http://www.fundyfarmcottages.com/)
The lumber needs to be sanded to get rid of bumps and inkings, and knotholes and dings filled. I save the sawdust, and mix it with white glue or carpenters glue for an inexpensive filler for the larger holes.
I use this stuff for finer cracks and nicks, thank goodness they have now come up with a human friendly type of wood filler that doesn't knock you back with noxious fumes. The reason I'm going to all this trouble is because I want an open type ceiling so that from down below you see the exposed joists. I'm going to whitewash the joists and underside of the t&g with a dilute paint/water mix so that the grain of the wood will show through. The upper side will be lightly stained and varathaned.
My trusty old old sander has seen better days. Yes, that's a vacumn cleaner bag duct taped to the dust catcher hole. The thumb button that keeps the machine running without using the squeeze trigger quit long ago. It's very tiring to keep your finger pressing the trigger constantly, but there's a fix for that! Just use a rubber band from a bunch of broccoli, wrap it around the trigger and run a large twist tie through the rubber loops and twist. With a bit of trial and error adjustment with the twist tie and rubber band tension you can find the sweet spot where you only need the slightest finger pressure on the trigger to run the machine. The rest of the squeezing is being done by the tension of the rubber band. Alas, my poor old sander fell on the deck today and the front handle snapped off. Maybe if this gets pathetic enough DH will buy me a new one for mothers day..
Labels:
ceiling project,
climate change,
sander
Sunday, January 1, 2012
What a perfect winter! A little snow for Christmas, gone in a couple of days, and now it feels like one long fall season with soft bare ground and +7C forecast for tomorrow. Very nice for getting outdoor work done.
We are lucky to have a skilled backhoe operator close by to address our erosion woes. After roadbuilding above and behind our rental cottage we have been getting an awful lot more water cascading down the hill after every rain. So much so that it would be a matter of time before the cottage fell into the hole that was growing at an alarming rate. We lined the muddy banks with landscape fabric and I built a kind of sluiceway to direct the water flow out over the eroding edge.
The 10" plastic culvert was dug out of the driveway (above) and replaced with some scavenged 15" concrete pipe.
Which gave us enough pipe to complete the drainage down to the ditch along the driveway.
Come spring I think planting some low growing bush conifers will disguise the edges of the landscape fabric and make things look more natural.
We are lucky to have a skilled backhoe operator close by to address our erosion woes. After roadbuilding above and behind our rental cottage we have been getting an awful lot more water cascading down the hill after every rain. So much so that it would be a matter of time before the cottage fell into the hole that was growing at an alarming rate. We lined the muddy banks with landscape fabric and I built a kind of sluiceway to direct the water flow out over the eroding edge.
Amazing how he can carefully place those huge boulders with that unwieldly looking bucket.
The 10" plastic culvert was dug out of the driveway (above) and replaced with some scavenged 15" concrete pipe.
Which gave us enough pipe to complete the drainage down to the ditch along the driveway.
That's a lotta rock! Now I'm going to go soak my old back...
Labels:
erosion project
Thursday, December 8, 2011
Christmas Sheep and Fun With Gardening
It makes me quite giddy with happiness to have green things still growing vigorously in the unheated glass greenhouse a week into december. I was able to pick 2 good bags of kale for a couple of my csa customers, with enough left for my morning omelettes. One of my favorite ways to eat kale is to chop up a handful of it in small bits, whisk it into an egg or two, with a bit of chopped onion and mushroom, and make a cheezy omelette. Yum! And so healthy. Kale is such an amazing powerhouse of nutrients.
I started my next painting..., in a bit of a hurry to get two entries ready for a January show in Saint John, with an entry deadline of next week. Here is the under painting of watercolor on toned pastel paper. This will be a mixed media of watercolor and pastel chalks.

I started my next painting..., in a bit of a hurry to get two entries ready for a January show in Saint John, with an entry deadline of next week. Here is the under painting of watercolor on toned pastel paper. This will be a mixed media of watercolor and pastel chalks.
Labels:
greenhouse,
kale,
mixed media,
pastels,
Sheep,
watercolor painting
Tuesday, December 6, 2011
Switching Gears
I always loved cows, their placid demeanor and thoughtful cud chewing appeal to me. At least the cows of my past, allowed to roam in sunny pastures, grazing their natural grass diet...being contented cows. The poor beasts in factory farm feedlots today..so sad.
I have painted this pair before in acrylic but I like this watercolor version better. (matted prints are available) It's been hard to stay indoors and take up the brushes again, with such a warm fall calling me outdoors. Today it's raining and the manure spreading will have to wait , so I will begin a painting of a pair of sheep.
Labels:
cows,
watercolor painting
Friday, November 18, 2011
Amazing November
Since the last post the weather has been unbelievably warm, an average of 4C warmer than usual for November. I feel almost guilty for loving it so much as it must be an indication of the climate going crazy. Most days have been Tshirt weather and I'm still pulling edibles out of the garden. These gorgeous sweet cherry tomatoes are still producing in the small glass greenhouse and I've been harvesting cabbages, brussel sprouts and kale.
The winter cabbages make really good sauerkraut. Just shred and layer in a crock or glass jar with non iodized salt. Pack down tightly and cover with a weighted plate.
I use a nylon stocking to keep out any fruit flies. After a bit the salt will draw water out of the cabbage. (I had to add a bit of salted water to get it all submerged)
10 days into this I'm skimming "stuff" off the water surface, but that's normal as the cabbage ferments. It takes about 4-5 weeks to turn into delicious sauerkraut.
The kale I picked all through mid summer and fall is still producing so I have been digging it up and transplanting it to the glass greenhouse, to see if I can overwinter it.
Here it is nestled amongst the tomato plants and mulched with compost and lawnmower clippings. When the tomato vines succumb to winter I will just clip them off.
We get huge loads of leaves from our big linden trees and here is where they end up. I dump them on whatever part of the garden is in need of a nutritional boost and run over the piles with the lawnmower to shred them.
Then they get lightly tilled in so they dont blow away and by next spring nature will have disappeared them.
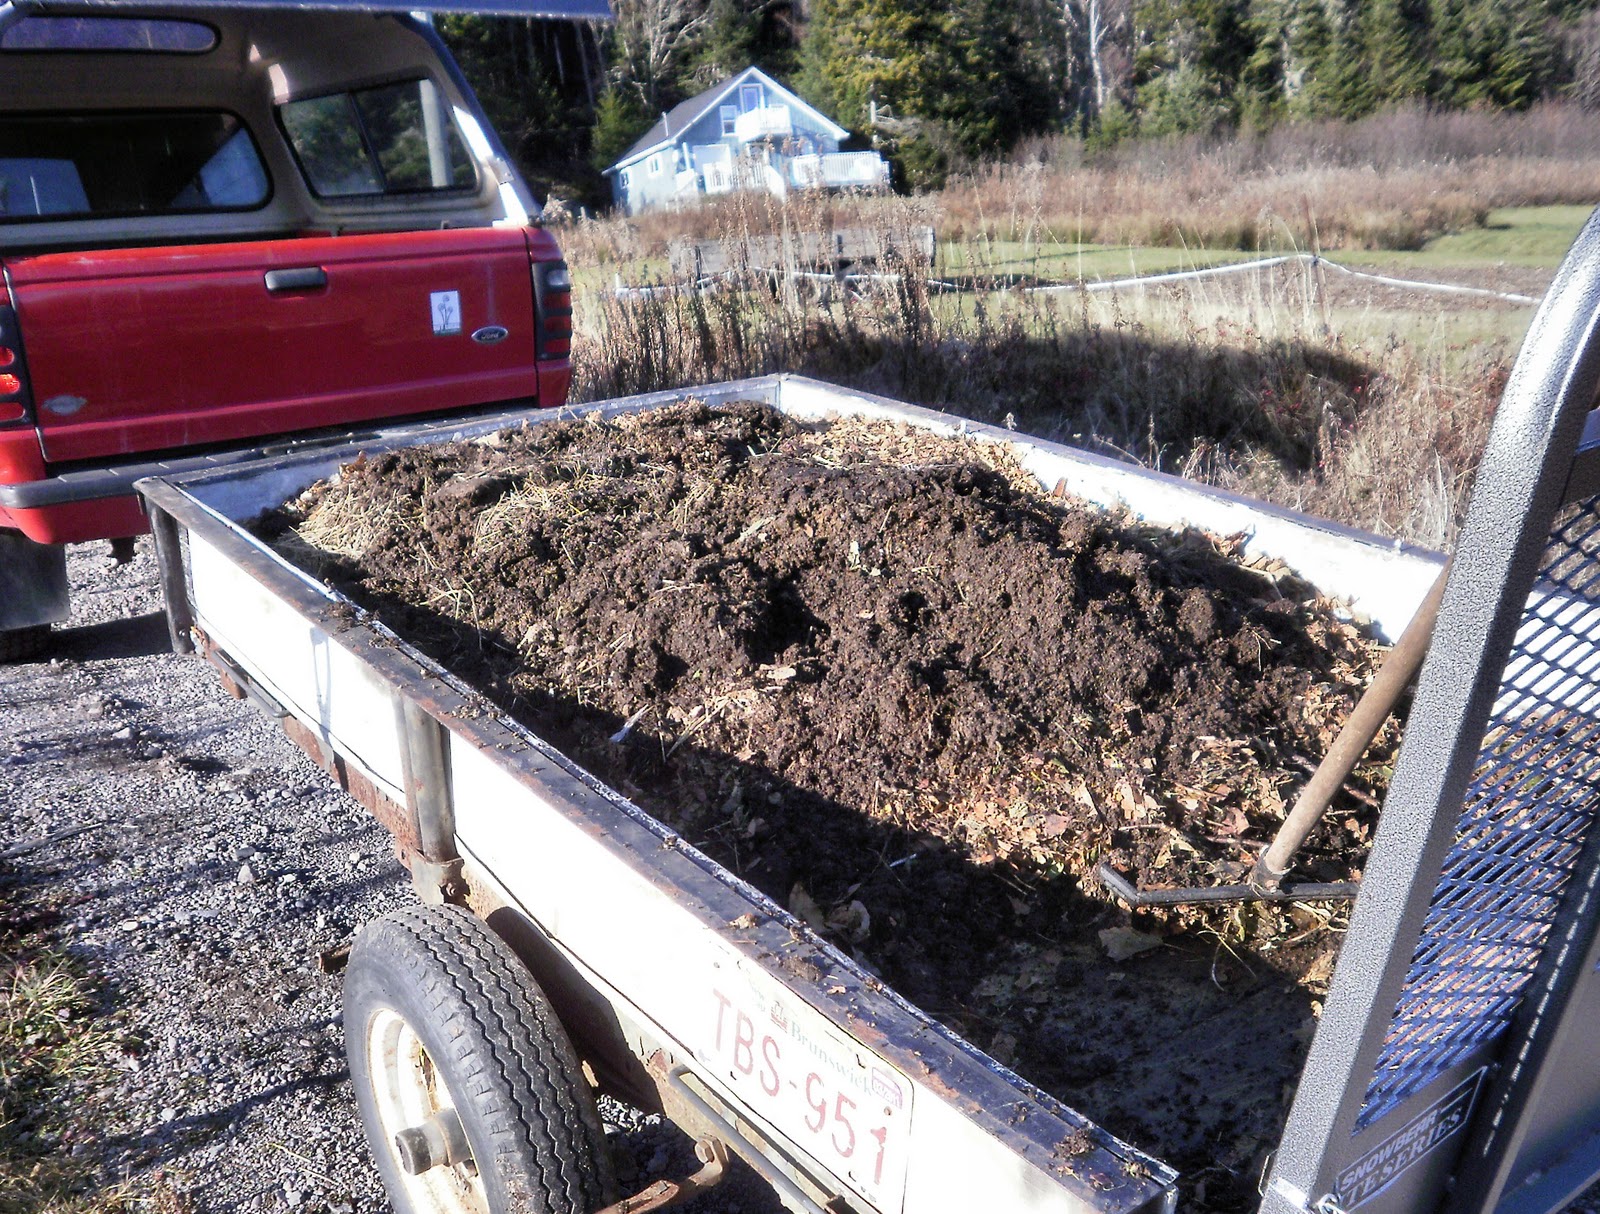
Here's a great load of 3 year old horse manure and leaves that went into the garden today.
But it's not all work! We are remembering to hike down to the beach while we can, to remind ourselves how blessed we are.
The winter cabbages make really good sauerkraut. Just shred and layer in a crock or glass jar with non iodized salt. Pack down tightly and cover with a weighted plate.
I use a nylon stocking to keep out any fruit flies. After a bit the salt will draw water out of the cabbage. (I had to add a bit of salted water to get it all submerged)
10 days into this I'm skimming "stuff" off the water surface, but that's normal as the cabbage ferments. It takes about 4-5 weeks to turn into delicious sauerkraut.
The kale I picked all through mid summer and fall is still producing so I have been digging it up and transplanting it to the glass greenhouse, to see if I can overwinter it.
Here it is nestled amongst the tomato plants and mulched with compost and lawnmower clippings. When the tomato vines succumb to winter I will just clip them off.
We get huge loads of leaves from our big linden trees and here is where they end up. I dump them on whatever part of the garden is in need of a nutritional boost and run over the piles with the lawnmower to shred them.
Then they get lightly tilled in so they dont blow away and by next spring nature will have disappeared them.
Here's a great load of 3 year old horse manure and leaves that went into the garden today.
But it's not all work! We are remembering to hike down to the beach while we can, to remind ourselves how blessed we are.
| Jimmy waxes artistic and leaves his self portrait on the beach... |
Labels:
beach,
kale,
mulch,
sauerkraut
Saturday, October 29, 2011
Lots to do before the snow flies...
Lots and lots of fall chores, which is a good way to spend the sunny cool days of late october. I think I've planted about 150 garlic cloves, tucking them in to holes poked in the soft rich soil where they will start to root before the ground freezes. The first welcome green shoots to come up in april will be garlic plants.
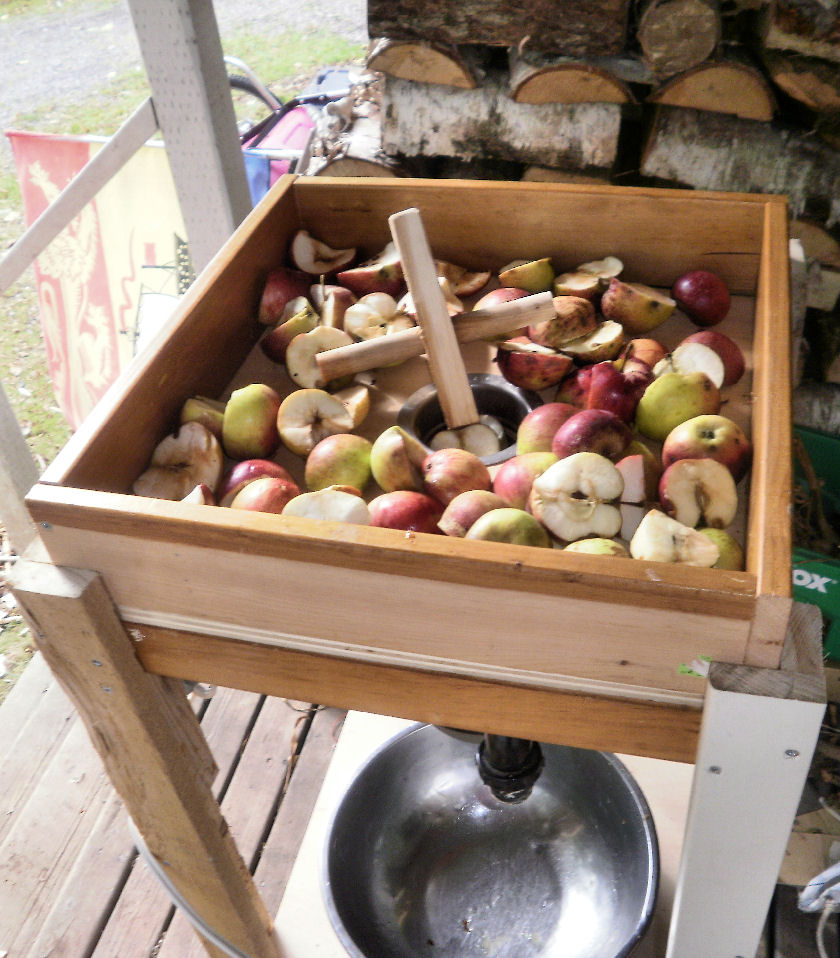
Apple cider! At last I get to use my birthday cider press...but first I needed a way to crush up the apples before they could be pressed. I built this stand to accomodate an under - sink garberator that I found on Kijiji.
Here is the underneath view with the machine running and disgorging the apple mush into the bowl below. It works wonderfully. Even tho the garberator is designed to run with water running through, it doesnt plug up, and the consistantcyof the apple goop is fine but not too fine to squeeze through the holes in the pressing bag.
I can poke the apples down with this stick with a dowel through it, to keep it from going too far into the grinding chamber.
I made a wooden juice collection tray with a drain hole at the front. The press came with a plastic oil changing pan for juice collecting (which I found quite horrifying and promptly discarded)
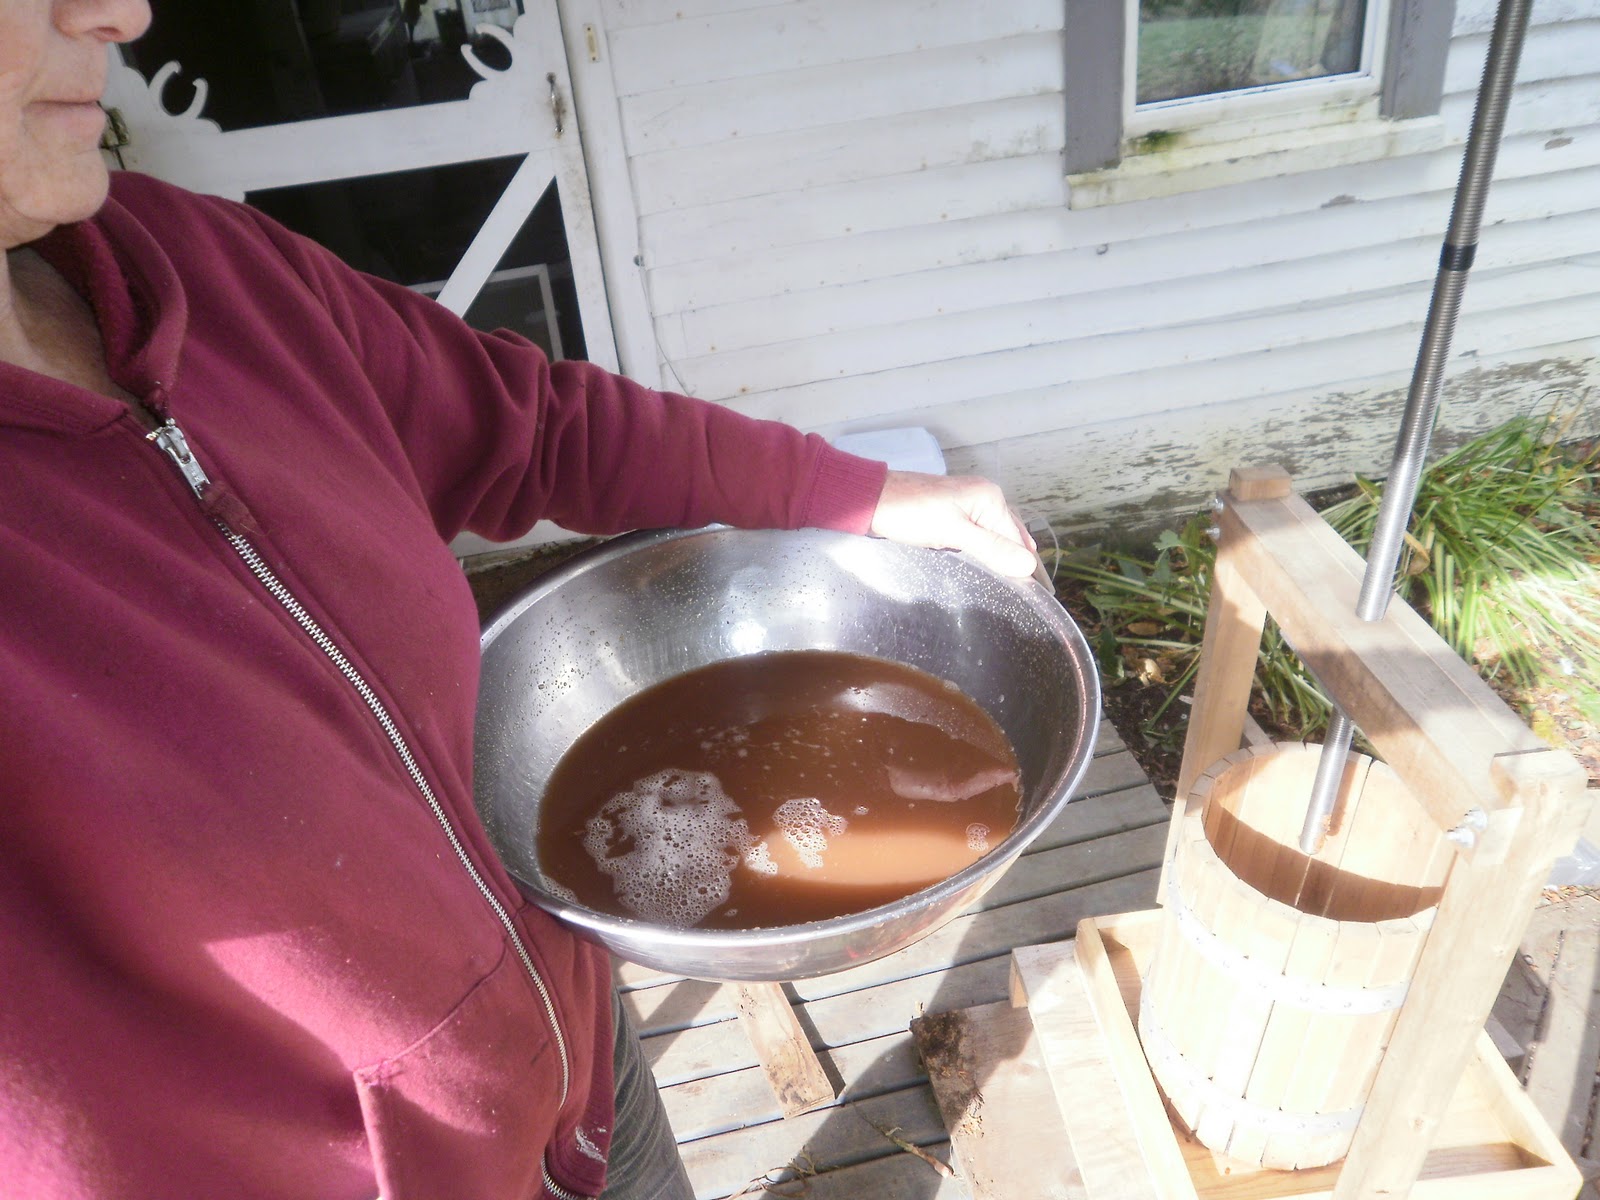
Lots of delicious juice, all from wild apple trees from here and there.
The apple corral comes off for cleaning. And a couple of jugs of water poured through the garberator with the motor on, cleans the insides.
The dryish pulp left in the pressing bag got spread onto trays in the dehydrator to make winter nibbling treats for the mini horses.
Nothing really ever gets wasted on a farm . Between horses, hens and compost there's a place for all the scraps.
Apple cider! At last I get to use my birthday cider press...but first I needed a way to crush up the apples before they could be pressed. I built this stand to accomodate an under - sink garberator that I found on Kijiji.
Here is the underneath view with the machine running and disgorging the apple mush into the bowl below. It works wonderfully. Even tho the garberator is designed to run with water running through, it doesnt plug up, and the consistantcyof the apple goop is fine but not too fine to squeeze through the holes in the pressing bag.
I can poke the apples down with this stick with a dowel through it, to keep it from going too far into the grinding chamber.
I made a wooden juice collection tray with a drain hole at the front. The press came with a plastic oil changing pan for juice collecting (which I found quite horrifying and promptly discarded)
Lots of delicious juice, all from wild apple trees from here and there.
The apple corral comes off for cleaning. And a couple of jugs of water poured through the garberator with the motor on, cleans the insides.
The dryish pulp left in the pressing bag got spread onto trays in the dehydrator to make winter nibbling treats for the mini horses.
Nothing really ever gets wasted on a farm . Between horses, hens and compost there's a place for all the scraps.
Labels:
apple cider,
cider press,
garlic
Subscribe to:
Posts (Atom)